Charley Hutton, custom painter extraordinaire, explains how to create a realistic wood grain look with a few simple tools and Envirobase® High Performance basecoat. A painted wood-grain effect is one way to add a distinctive look to your custom build. In this guide, Charley demonstrates how to paint a panel with one style of wood in the center, framed by another wood grain look.
Creating the wood grain effect is about having the right tools. You'll want to have a variety of sponges, some with loose density for creating larger grain, and others more dense for tighter grain. Sea sponges are ideal. You'll also need a choice of brushes, preferably inexpensive ones with stiff bristles. The brushes are used to create very tight grain lines, what we call the "dry brushing" technique. And finally, you’ll need an airbrush and compressor for shadowing and highlighting.
Charley Hutton Explains how to Create a Realistic Wood Grain Look
Step 1 - The Paint
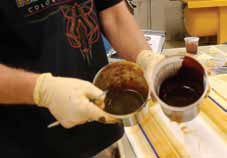
Two colors of basecoat are needed for the wood-grain look—a dark, reddish brown (T442 Woody Brown at 800.0 pts. and T430 Green 100.0 pts.) and a lighter tan color (T429 Trans. Golden Yellow at 940.0 pts., T442 Brown 40.0 pts. and T430 Green 20.0 pts.) In my case, I use Envirobase® High Performance basecoat and it works wonderfully. I especially like the fact that if you apply some paint and you don't like the effect you’re getting, you can easily re-wet again with more waterborne color, giving yourself a fresh start.

Step 2 - Painting the Outer Frame
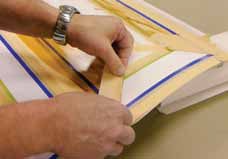
I’m starting with a white base-coated panel, masked off to create a center panel. Each end of the outer frame should be masked with mitered corners, typical of wood frames.
Step 3 - Light Tan on the Outer Frame
Start with the top and bottom portions of the frame. Wet your finer sponge with the lighter tan color, squeezing out the excess by pressing it into the side of the mixing cup. Then, simply drag the sponge across the surface in one direction, repeating the process several times.
Step 4 - Creating an Authentic Look
Then, as the paint begins to dry and get sticky, drag your gloved hand across the painted surface. As it begins to drag it’ll create authentic-looking grain with that knotty look. After dragging all the way across the panel for several strokes, start from the center and drag, and make smaller swipes in succession, gradually tapering your strokes to short swipes. If the paint starts to set, just re-wet it with more waterborne paint.
Step 5 - Painting the Side Panel
After finishing the top and bottom of the outer frame, mask the corners off before doing the sides. Be sure to "under mask" a bit, which in the end will create a darker line highlight. Then, using your sponge and gloved hand, create the wood-grain look on the side panels, as you did on the top and bottom. Remove the masking on the corners and allow the paint to dry.
Step 6 - Masking the Outer Frame
Next, we need to mask the outer frame to create a beveled look. With ¼-inch tape, mask from the side where you want the light source to appear to come from. Do the same with the bottom edge. Then mask the frame panels, leaving only the bottom edges of the frame exposed.

Step 7 - Shadows
Airbrush the areas left unmasked. This will darken them and create the illusion of shadows.
Step 8 - Re-Masking and Highlights
After creating the darker shadow lines, re-mask over the lines in preparation of creating a lighter, highlight line. Once you airbrush the unmasked areas of the frame, making it darker, the area covered by the tape will leave a lighter, highlight line.
Step 9 - Shadow and Toning
Next, reduce the same lighter color with a clear basecoat T490 at 2:1, and reduce 4:1 with reducer. This will make the color more transparent. Airbrush the outer frame panels to add tone and accentuate the grain in the wood. When the ¼-inch lines are unmasked it will leave the lighter highlights.
Step 10 - Painting the Center Panel
After it's dried, re-mask the outer frame, and remove the masking from the center - you're ready to create the wood grain effect on the middle panel. With the sponge, use the same technique as the outer frame to apply the color. Start at one end and drag the sponge in straight lines across the panel. Keep applying coats and as the paint begins to dry, it'll get sticky and cause the sponge to drag. This creates a streaked, grained look.
Step 11 - Adding Tone
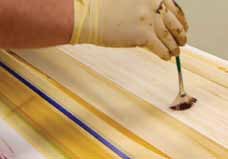
Now you want to add tone with a paintbrush and the darker, reddish shade of brown. Dip the brush into the mixing cup and tool it out, so little is left on the bristles. Using light strokes, swipe the brush across the panel, creating the darker streaks. First, apply strokes horizontally across the panel. Be sure to leave streaks to mirror the inconsistent color of natural wood

Step 12 - Ribbing
Next, airbrush the panel in vertical, up 'n down strokes. This is called "ribbing."
Step 13 - Logo Option
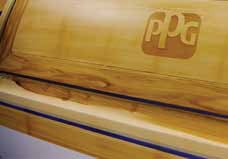
If you'd like to add a simple logo, this is the stage to do it. Using the same paint you used to tone the wood, airbrush the cut-out of the logo. This will create a darker highlight around the letters, creating a de-bossed effect.
And here's the finished look

